

Apple Pay
This documentation is intended for merchants integrating ePay Blocks directly. If you are using ePay Checkout, no additional setup is required for Apple Pay.
We recommend that all merchants use the Quick Setup guide, as it reduces the maintenance burden on your integration. By using Quick Setup, ePay can automatically apply updates to your integration for any future changes to Apple’s protocols.
Quick Setup
To integrate Apple Pay, make the following changes to your implementation:
// Add Apple JS SDK<script src="https://applepay.cdn-apple.com/jsapi/1.latest/apple-pay-sdk.js"></script>// Added ApplePay button<apple-pay-button buttonstyle="black" type="buy" onclick="epay.createApplePayTransaction()"></apple-pay-button>Advanced Setup
If you have any special needs, like tracking, regarding ApplePay transactions and the in-app experience you can modify the payment flow by manually creating the ApplePay payment session.
// Only call this function when the customer clicks on the pay buttonfunction beginApplePayPayment() { // Use the standard payment request by ePay that automatically adapts // to your payment session data and merchant capabilities. let sessionData = epay.createApplePayRequest(); // Or create the ApplePay data yourself. // Ensure amount and currency is the exact same as sent to ePay. let sessionData = { countryCode: "DK", currencyCode: "DKK", total: { label: "Køb hos XYZ", amount: 19900, }, supportedNetworks: ["visa", "masterCard", "maestro"], merchantCapabilities: ["supports3DS"], }; const session = new ApplePaySession(14, sessionData); // The customer has opened the app and requires merchant validation with Apple session.onvalidatemerchant = (event) => { epay.validateApplePayMerchant(session, event); // Required step by ePay }; // Customer authorized the payment in-app session.onpaymentauthorized = (event) => { epay.authorizeApplePayTransaction(session, event); // Required step by ePay }; // Customer dismissed the payment UI session.oncancel = (event) => { console.log("customer dismissed payment UI in-app"); }; session.begin();}<apple-pay-button buttonstyle="black" type="buy" onclick="beginApplePayPayment()"></apple-pay-button>Register merchant
Prerequisites
Before you begin, ensure you have the following:
An Apple Developer account.
Access to the Apple Developer Portal.
The ability to upload certificates to ePay.
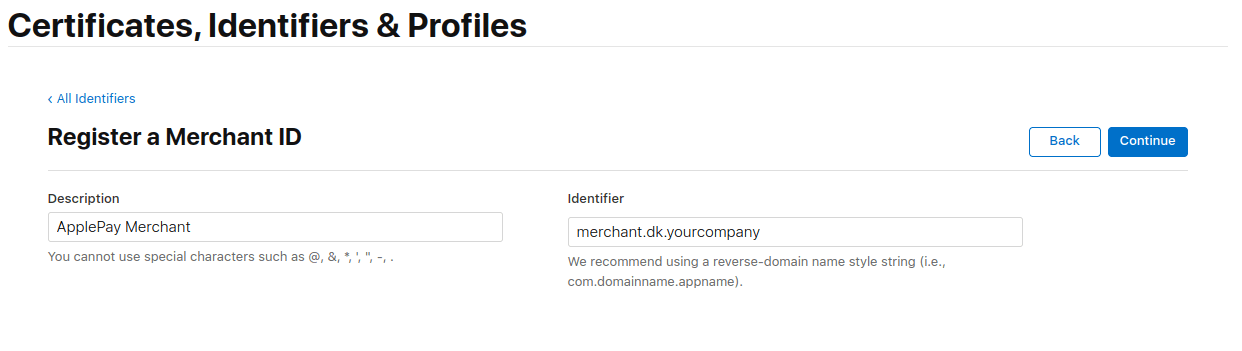
1. Create a Merchant ID
Sign in to the Apple Developer Portal.
Navigate to Certificates, Identifiers & Profiles.
Under Identifiers, select Merchant IDs.
+ button to create a new Merchant ID.Enter a Description and a Merchant Identifier, for example
merchant.dk.yourcompany.
Click Continue and then Register to save your
Merchant ID.
2. Edit your Merchant ID
In the Apple Developer Portal, go to Certificates, Identifiers & Profiles.
Under Identifiers, select Merchant IDs.
Select your Merchant ID in the Apple Developer Portal.

3. Create certificates
While in the "Edit or Configure Merchant ID" panel you must now create your ApplePay certificates.
Create Processing key and CSR
openssl ecparam -out processing.key -name prime256v1 -genkeyopenssl req -new -sha256 -key processing.key -nodes -out processing.csrWhen creating the CSR, you will be asked for various company details. The specific values are not important—just enter reasonable values.
Country Name (2 letter code) [AU]: DKState or Province Name (full name) [Some-State]: JyllandLocality Name (eg, city) []: SvenstrupOrganization Name (eg, company) [Internet Widgits Pty Ltd]: ePayOrganizational Unit Name (eg, section) []:Common Name (e.g. server FQDN or YOUR name) []: epay.euEmail Address []:A challenge password []:An optional company name []:Upload the processing CSR to Apple
After creating processing.key and processing.csr you must now upload processing.csr to Apple to receive your processing certificate.
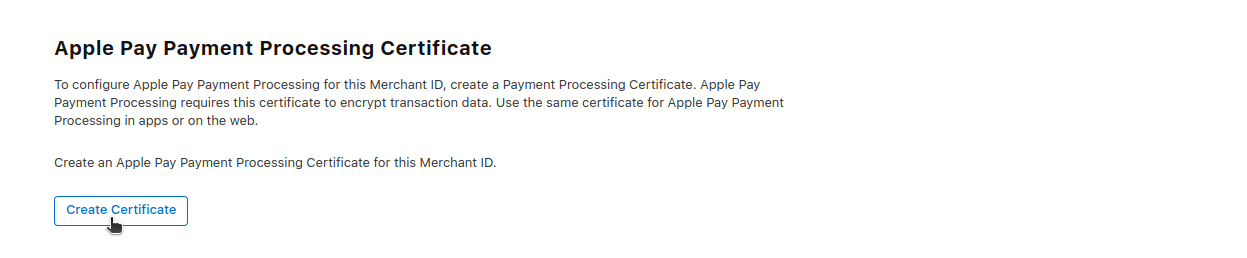
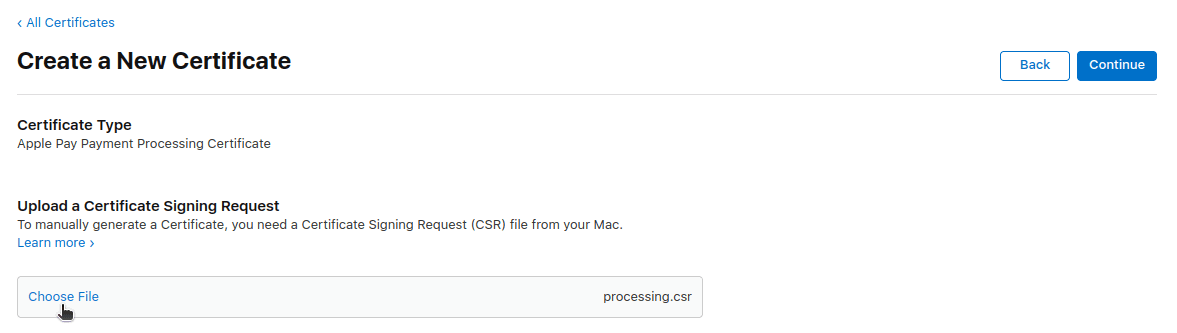
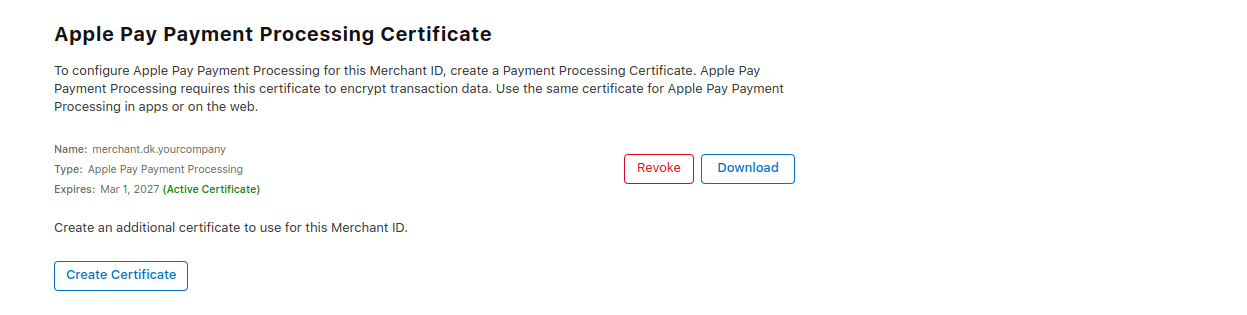
You should now have an active processing certificate registered for your ApplePay merchant.
Create Merchant key and CSR
openssl req -sha256 -nodes -newkey rsa:2048 -keyout merchant.key -out merchant.csrWhen creating the CSR, you will be asked for various company details. The specific values are not important—just enter reasonable values.
Country Name (2 letter code) [AU]: DKState or Province Name (full name) [Some-State]: JyllandLocality Name (eg, city) []: SvenstrupOrganization Name (eg, company) [Internet Widgits Pty Ltd]: ePayOrganizational Unit Name (eg, section) []:Common Name (e.g. server FQDN or YOUR name) []: epay.euEmail Address []:A challenge password []:An optional company name []:Upload the merchant CSR to Apple
After creating merchant.key and merchant.csr you must now upload merchant.csr to Apple to receive your merchant certificate.
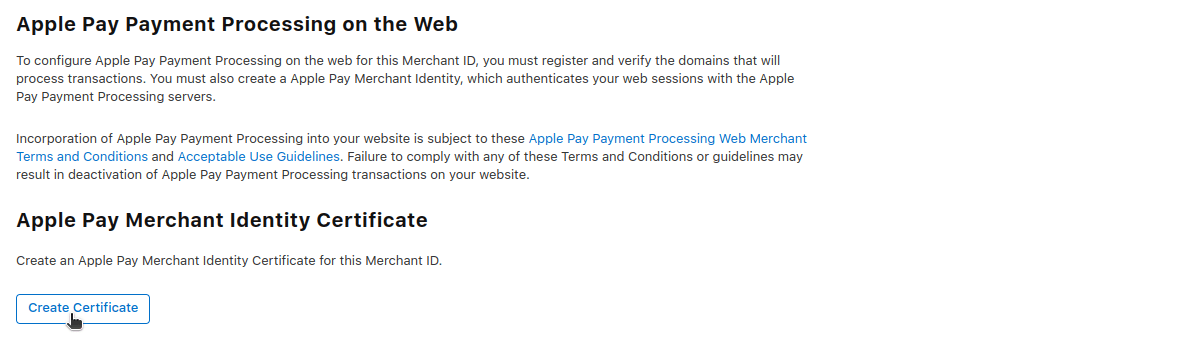
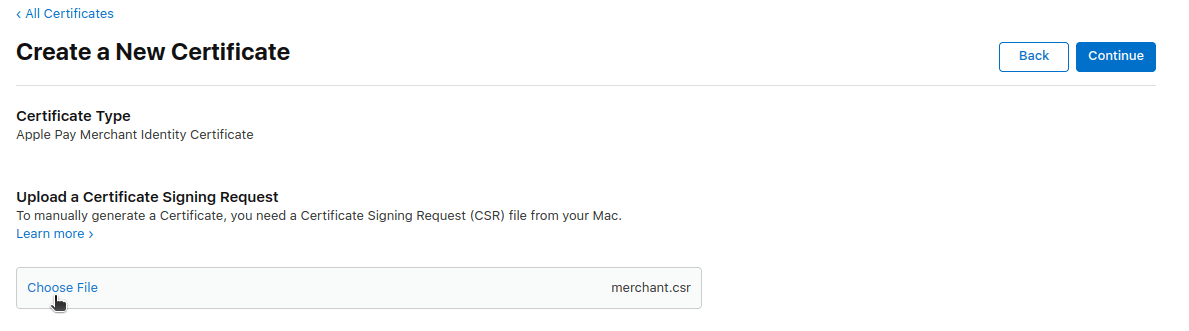
Make sure to download the merchant certificate - This file is often named merchant_id.cer
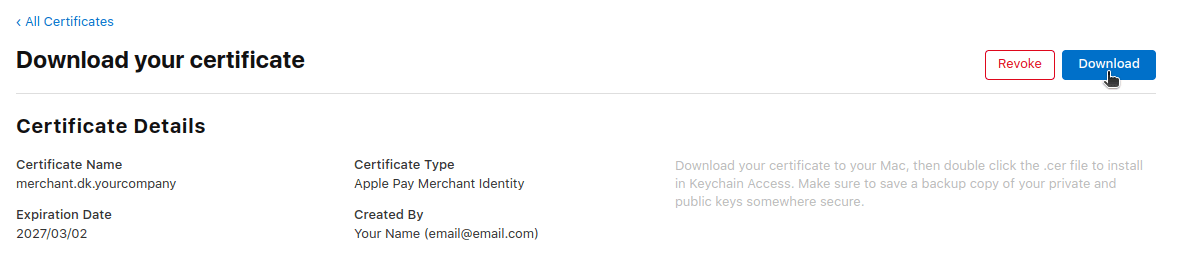
 You should now have an active merchant certificate registered for your ApplePay merchant.
Convert merchant certificate format
You must change the format of the merchant_id.cer merchant certificate to a .pem format.
openssl x509 -inform der -in merchant_id.cer -out merchant.pem4. Upload the Certificate to ePay
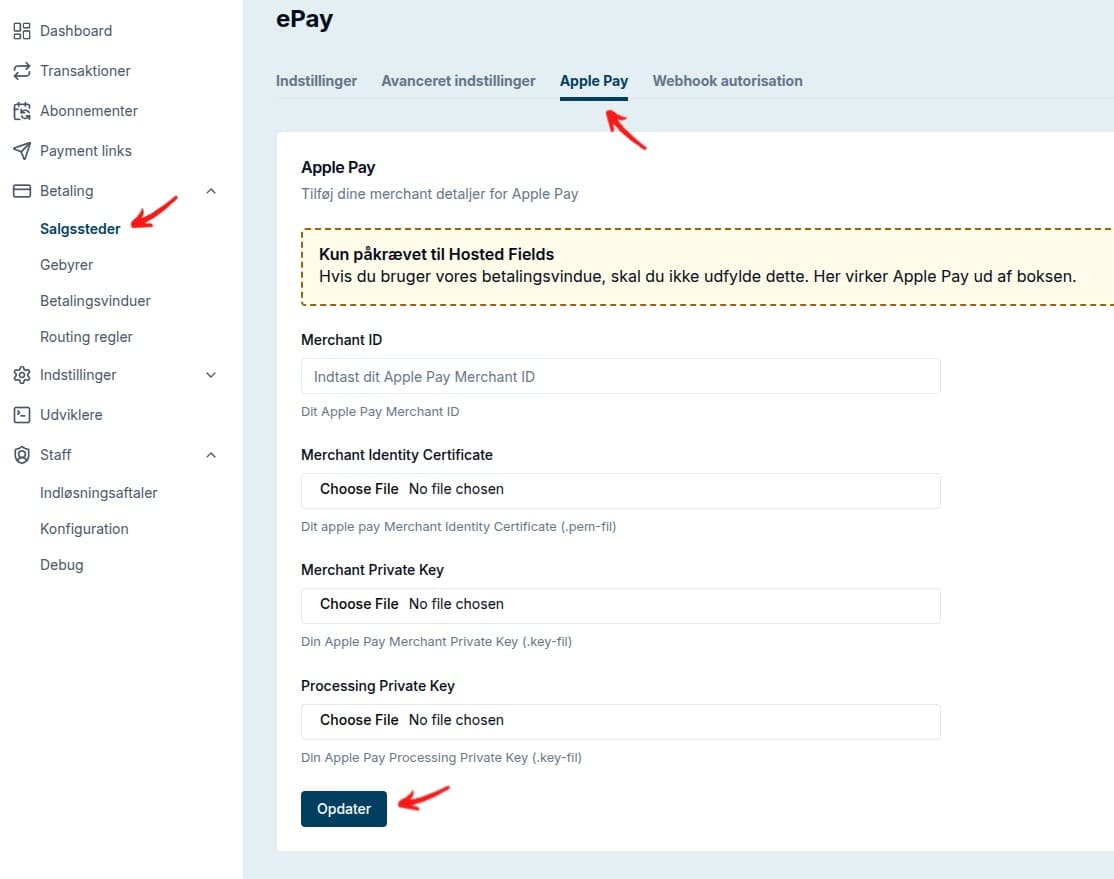
Sign in to your ePay Merchant Portal.
Navigate to your point of sale Apple Pay Settings.
Enter your Merchant Identifier: merchant.dk.yourcompany
Upload the Merchant Identity Certificate: merchant.pem
Upload the Merchant Private Key: merchant.key
Upload the Payment Processing Private Key: processing.key
Save your settings.
5. Verify your domain

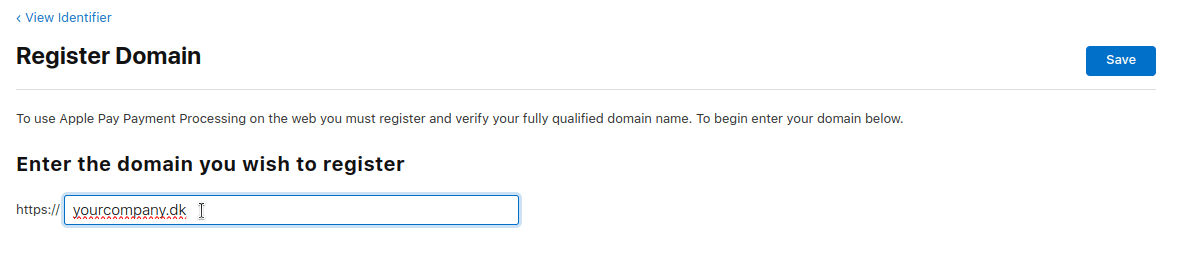
Download the identity file and upload it to your server at the Apple requested location:
Once completed click Verify.
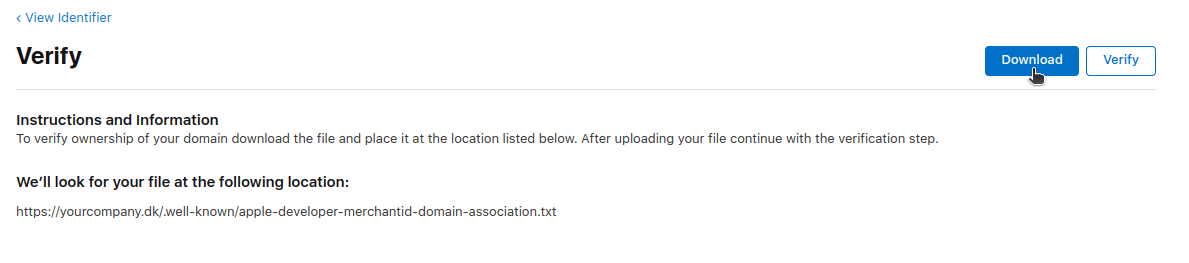

You should now have a verified domain. You can add more domains to the same merchant if you need to receive payments from multiple domains or subdomains.
6. Verify Integration
Ensure your Apple Pay setup is active by testing payments in Test Mode.
Use Apple's Apple Pay JS API to verify integration.